Considering current trends in the video gaming industry and innovative solutions brought about by engines like Unreal, a photorealistic look of 3D models becomes a new standard of quality. In particular, similar tendencies come to the forefront in AAA projects that must continually raise the bar for AA or indie games, thereby driving the industry toward evolution.
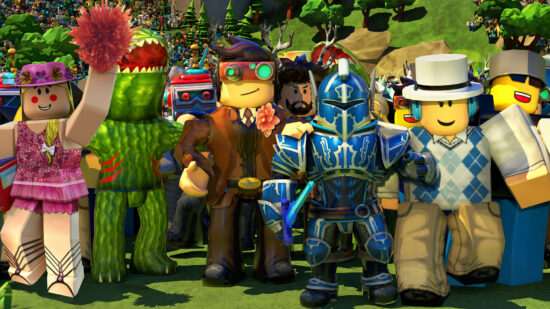
With the advent of Unreal Engine 5 as well as the updates for 3D sculpting and modeling software like ZBrush, Blender, or Autodesk Maya, hyper-realism is gradually becoming the new normal. Without a doubt, stylized characters, environments, weapons, and props will remain in the industry as a means of conveying unique ideas, but photorealism is what will make the 3D content market move forward.
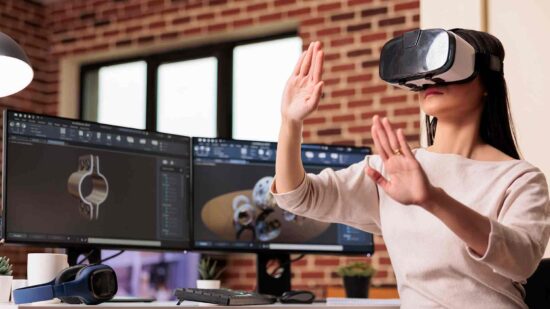
Under the impact of technological advancement, 3D modeling services worldwide continue to evolve, providing more value for the end-user. In this article, we will peek behind the curtains of 3D modeling and reveal how skilled technical artists make their masterpieces look photorealistic. Let’s take a deep dive and get all the answers!
Insights on How to Make 3D Content Look Realistic
So, how to make photorealistic 3D models? Primarily, you should find out whether you’d like to create 3D models by yourself or hire someone to do this instead. Once you’ve made up your mind, go down below to learn about the approaches, methods, techniques, and software required to create hyper-realistic 3D content of any kind.
Leverage Detail Maps
In order to get the best quality, you can overlay multiple maps, including contour, image, and other surface maps. As a rule, present-day modeling software allows artists to apply maps of various formats, so making use of them is essential. For instance, 3D modelers refer to lossy and non-lossy bitmaps (like TARGA), importing maps that ensure a realistic effect.
In addition, technical artists create an illusion of real texture by taking advantage of detailed maps, especially when they resemble certain textures like fiber. Furthermore, it’s of utmost importance to pay attention to the material you are working with. It depends on whether your model needs to be glossy or matte in actual life. Realistic models follow natural patterns.
Make Lights Softer
This recommendation primarily relates to pre-rendered 3D modeling or scenes outside of a game engine because characters move around a virtual environment, which makes it difficult to equally control the lighting of all areas. Also, switching lights to a static mode and baking them in a game engine allows for greater optimization but not always provides a photorealistic appearance of 3D models.
Nevertheless, advanced game engines like Unreal Engine 5, given its innovative global illumination technology called Lumen, can help developers and artists tweak lighting properties in a way that highlights each model’s realistic look. Whether you use ambient, directional, or omni light type, it’s beneficial to soften the light in your scene to an extent that facilitates pure as well as realistic reflections (besides quality surface maps and materials).
Reconfigure the Maps
By adjusting the default surface map, you add a personal touch to every 3D model, be it a creature, human being, or weapon. As a rule, while creating 3D content, artists use such basic map properties as highlight and shadow parameters, surface texture, color gradation, shininess or reflectiveness, etc. Reconfiguring these characteristics implies adding extra sophistication and elaboration to a final model.
Use Realistic Materials & Effects
Whenever you apply a certain material or built-in effect, you fundamentally change the appearance of your model without changing the poly count. For instance, if an artist is working on a 3D cat model, they will likely use a fur material instead of metal, unless they want the animal to look like a robot from another planet.
Every time you experiment with quality materials and post-processing effects, you get unique results that add extra realism to your project. Pay careful attention to the environment or scene where your model will be placed or move around (if it’s a game). Consider the terrain, level of exposure to natural light, surrounding shadows, biome, etc.
Refer to Quality Textures & Bump Mapping
If you intend to create realistic 3D characters, you’ll definitely need high-end software packed with quality textures. For example, Substance Painter, as an industry standard for 3D artists, provides a broad spectrum of tools to add quality textures to models of any complexity.
What’s more important, most of them don’t increase a model’s poly count, meaning that it will perform as expected inside a game engine because the applied materials function as textures. Wherever it’s natural and obvious, use bump mapping to create bumps, wrinkles, or other texture deformations, increasing a model’s resemblance to an object in real life.
Utilize 3D Scanning
How often do you hear about photogrammetry? Well, we bet this technology is kept in secrecy due to its advanced functionality and stunning results it brings. You can take real advantage of making dozens or even hundreds of photos of actual objects you want to turn into polished 3D models via professional software like Agisoft Metashape.
Fortunately, today there exist helpful 3D scan cleanup services that can help do this work for you. Since raw 3D scans of humans or objects are always rough, extremely high-poly, and suffering from deformed geometry, you’ll need professional tech artists to fix all this. Nonetheless, once the work is done, you get perfect and ultra-realistic humans or props.

Tips on How to Create Photorealistic 3D Models
Now as we’ve collected the most widely employed techniques to make models look photorealistic, it’s time to talk about applying these principles to specific model types. Evidently, the usage of lighting, texturing, and post-processing effects will vary depending on whether you are working on a model of a human, animal, fantastic creature, or environment.
Overall, a minimal number of suggestions on how to create photorealistic 3D models boils down to the following:
- Collect quality references;
- Split the screen or use a second monitor to place references;
- Use as many polygons as needed to ensure greater detail;
- Refer to human/animal anatomy for sculpting or modeling creatures;
- Make use of blueprints, schemes, and other documentation whenever modeling a hard-surface weapon, building, or props;
- Soften your scene or world lighting;
- Consider the most advanced game engine to handle high-poly models without any performance issues if you want your 3D content to appear in a game;
- Apply realistic and quality materials, textures, as well as maps.
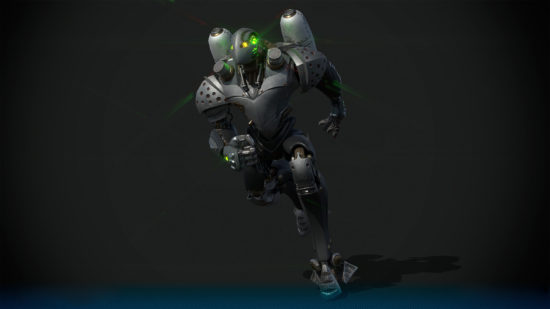
3D Characters & Creatures
Before questioning yourself about how to create realistic 3D characters, it’s essential to inquire about what type of model you’ll be working on, inasmuch as it will dramatically affect the lighting type, textures, and materials used. If we, say, are elaborating on an extraterrestrial 3D creature, the variety of maps as well as their configurations is enormous, let alone that the model’s appearance must look naturally within a given environment.
Consider the biome, lighting style, and physical properties of a fantastic planet where your alien will appear, finding out what textures along with materials to apply to your mesh. Interestingly, the level of realism and detail in this specific case will depend on how accurately the materials reflect lights. Also, it’s necessary to define whether your creature’s color scheme matches the one of the environment.
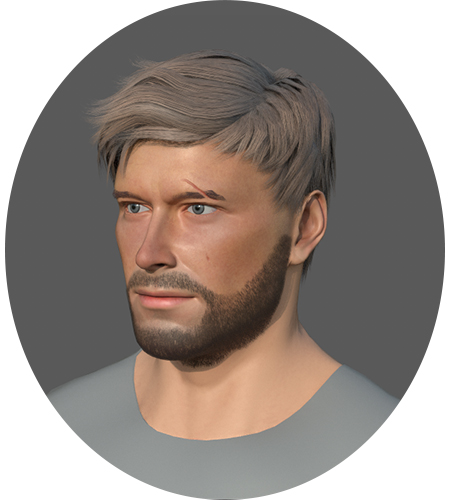
In turn, if an artist is creating a photorealistic human, they should perfectly know human anatomy and adjust lighting like in photo studios, depending on a desired scene. The same goes for materials because they need to be realistic and resemble those of actual humans. Ultimately, the polygon count should be incredibly high to ensure a good level of detail.
3D Weapons & Props
How to create photorealistic 3D models of weapons and props? Well, as we’ve already mentioned, you should start with cherry-picking realistic references, whether they are quality models of other artists or photos of actual objects. After modeling a gun, laying out its UV map, and adding the normal map, one of the crucial steps is to properly adjust your model’s metal shininess as well as reflectiveness.
In particular, adding bumps and scratches whenever necessary is another feature that ensures a model’s photorealism. Set color gradation and test your model inside a game engine or 3D scene with all the lighting properly adjusted so that you could get an idea of how well your model fits into the environment. Considering how long it takes to create a 3D model, you may want to speed up the process, but making haste isn’t an option. If that’s the case, you should better outsource this work to a professional studio.
3D Environments
Speaking about the setting or scenery, it’s absolutely crucial to rely on real-world photos while working on a 3D environment that’s supposed to be photorealistic. While stylized terrains are used to depict fantasy worlds, hyper-realistic ones need to literally copy the way nature looks. Therefore, artists must portray landscapes or urban locations according to the laws of physics, geometry, and biology.
Make Use of 3D-Ace Services to Get Polished Models
Creating hyper-realistic 3D content is unquestionably one of the toughest challenges in the industry. For example, one such human model can take up to 3-4 months to create from scratch, especially if it’s a custom character for a AAA video game. That’s why more and more large studios outsource a considerable chunk of 3D modeling work to optimize their resources.
Fortunately, 3D-Ace houses a team of experienced technical artists whose skills allow them to create photorealistic models that fit everywhere. Just contact us, and we’ll discuss the cooperation conditions you are most comfortable with to start creating realistic models for your upcoming project.