Animating the characters is a complex process that not only requires a lot of efforts but is also demandable towards the 3D assets that are expected to be brought to life. For that matter, each one of them needs to contain a certain amount of polygons that don’t exceed a number that would make a manipulation process impossible. But what if you want to retain a solid image quality in a high-poly character mesh and animate your in-game heroes at the same time? That is the case when a retopology services should come to your mind and allow for a smooth process of creating physical actions patterns for your characters.
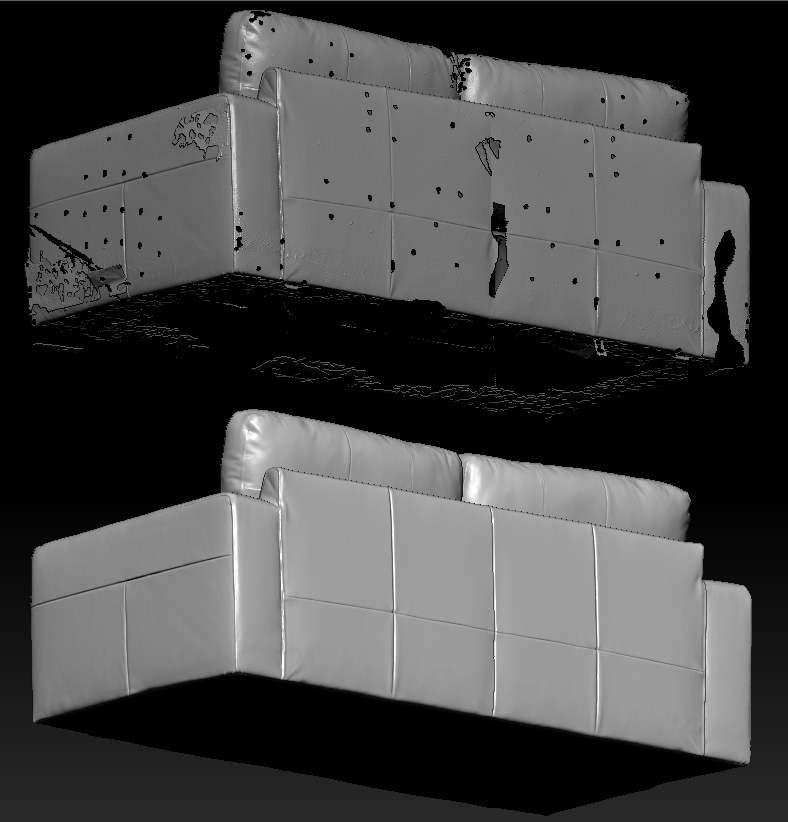
To kick things off, we need a set of raw mesh scans, that will further server us as the 3D assets. Given their level of details, these models can’t boast high convenience level when used in Maya. Locating the objects and dissecting needless model parts is an essential step for further manipulations and the “Separate” option can come in handy, however, there are better solutions when handling high-poly meshes.
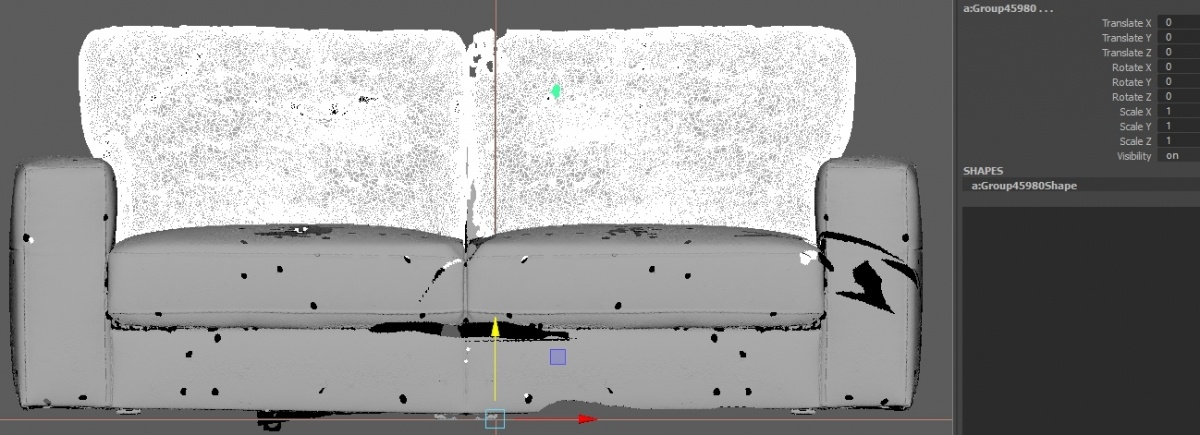
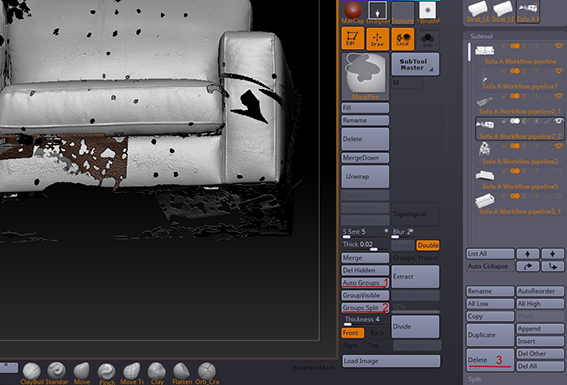
Firstly, we need to set a pivot and reset all the transformations down to 0 value beforehand. After that, we export the model in an obj file format and import it into ZBrush, where we can delete all the unnecessary model particles and manipulate its properties. For that matter, we use ZBrush, which allows for using Auto Groups and Groups Split commands and then choose Delete options for all the part that need to be removed.
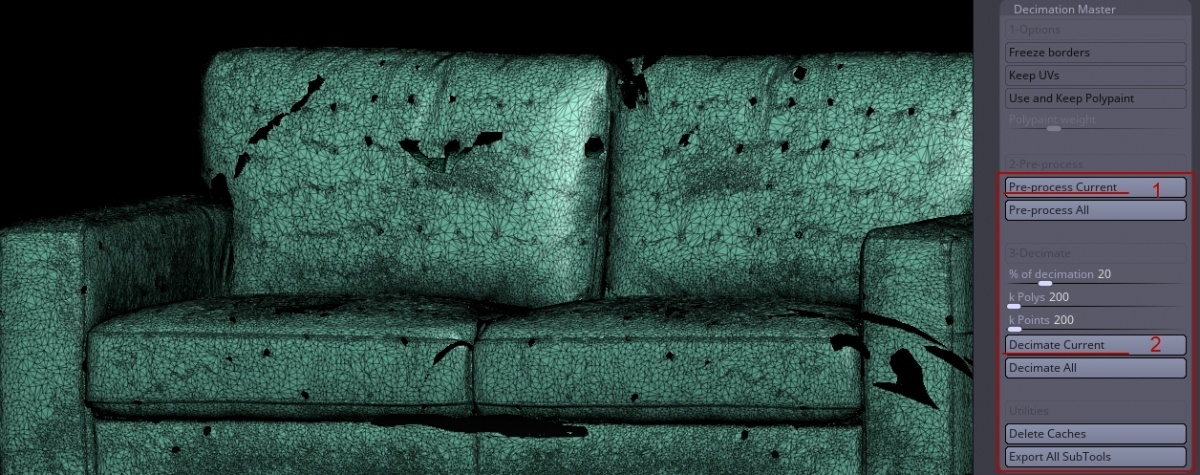
While being a powerful standalone app, ZBrush, on the other hand, has a free Decimation Master plug-in, that, if used correctly, allows to greatly reduce the poly count of a model and retain its visual appeal. By choosing the percentage values of each mesh area, you can manually choose how each model’s part will be preserved in details. And if a model has a large number of subtools, the artist can either decimate them together or separately.
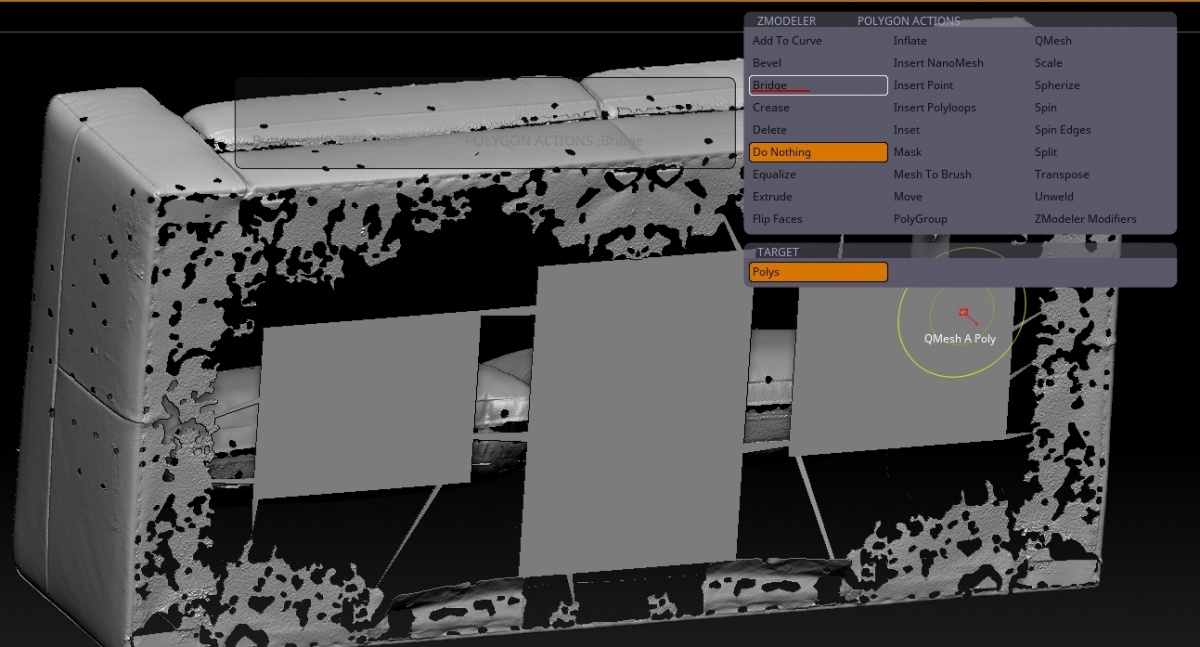
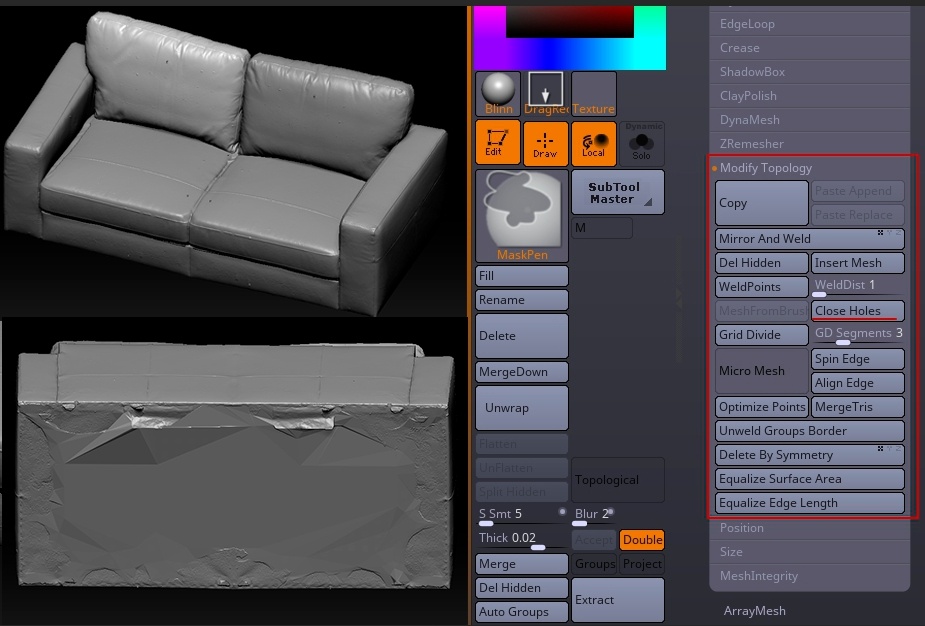
After the 1st decimation stage is done, an artist needs to patch the gaps inside the model. This is when the “Bridge” function comes in handy, allowing to pad the empty areas on the mesh. The 2nd attempt to decimate your object is optional, however, can help you further advance in lowering the poly count and should be followed by using a “Close Holes” command in a Modify Topology menu to polish the model’s flaws once again. Depending on artist’s preferences, DynaMash can also be used for that purpose or even ZRemesher if a fully automated retopology needs to be conducted outside of a decimation process scope.
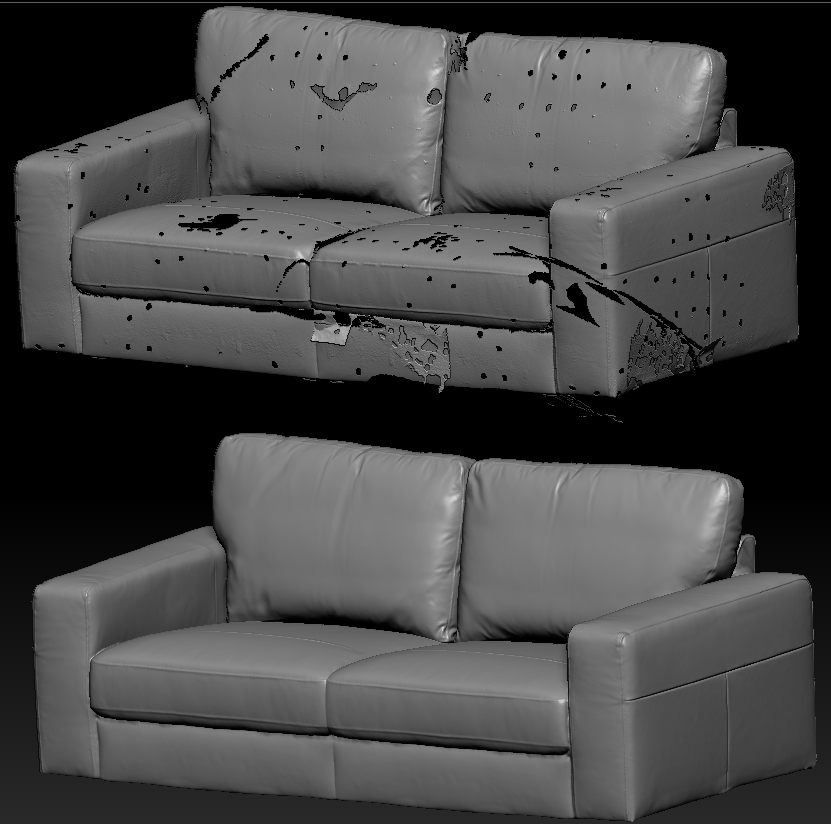
Then we slowly come to a polishing stage and it requires a meticulous approach towards burnishing the edges and corners of the mesh. To fix each of seams and folds an artist should use default brushes and tools to make the scan look realistic and clean from visual litter. After completing this stage and if conducted properly, we will have a spotless model free of glaring holes.
Displacement is the next important step that allows for baking a highly-detailed geometry onto a map that can be further applied onto a low-poly geometry and used separately. Thanks to a pixel conformity to the units’ number in a displacement scene, having correct settings values will enable projecting all the details onto a low-poly mesh. Depending on the preset numbers of the Map Size, Map Borders, and many other options, an artist will be able to create a low-poly mesh with seamless edges and precise projecting.
Depending on game designer’s or customer’s requirements, a displacement map can vary in its size, however, 4K(4096х4096 pixels) is a common value when starting the baking process by 2D textures(UV shells) wrapping 3D models. In this case, padding becomes extremely important, as it defines the range between each UV shell parts in pixels, that will further determine the number of LODs, available for each model and exist in a strict concordance to map’s size, and if padding range value is lower than 2, it may spoil the 3D model’s edges. UV Layout, however, can also be used to create and edit UV-coordinates for many types of 3D objects.
LOD, on the other hand, is a 3D asset, whose number reflects a multitude of different positions that a potential model can have with various detailing levels, depending on how far it is located to the camera and helps alleviate the pressure towards the game engine. The number of LODs will respectively depend on the map’s size and a padding value, therefore, it becomes more important to define the game engine and its visual quality level beforehand.
As a separate instance, displacement baking should be conducted after the high-poly mesh retopology is set and done, and is usually handled by a division method which helps effectively duplicate the initial high-poly mesh to be further projected onto a less detailed object, giving it almost the same looks, if done properly with an accurate distance value.
Conclusion
Given a complex modeling nature, the whole process may look like a convoluted mess, however, ZBrush and its plug-ins step forward as an effective solution when decreasing the 3D models’ size without losing their visual appeal. By reducing the poly count, a good 3D artist not only reduces the meshes’ weight but also enables diverse model scaling to reduce the pressure towards a game engine, let alone, allowing for a convenient animation process.
Authors
Oleg Volkov
Roman Ponomarenko